Debouncing in Flutter

Curiosity killed the cat, but satisfaction brought it back.
Look and analyze the code below. Did you find anything wrong or odd?
import 'package:flutter/material.dart';

void main() => runApp(MyApp());

class MyApp extends StatelessWidget {
  @override
  Widget build(BuildContext context) {
    return MaterialApp(
      title: 'Flutter Demo',
      debugShowCheckedModeBanner: false,
      theme: ThemeData(
        primarySwatch: Colors.blue,
      ),
      home: const MyHomePage(title: 'Flutter Demo Home Page'),
    );
  }
}

class MyHomePage extends StatefulWidget {
  final String title;

  const MyHomePage({
    Key? key,
    required this.title,
  }) : super(key: key);

  @override
  State<MyHomePage> createState() => _MyHomePageState();
}

class _MyHomePageState extends State<MyHomePage> {
  int _counter = 0;

  void _incrementCounter() {
    setState(() {
      _counter++;
    });
    var snackBar = SnackBar(
      content: Text('Yay! A Counter SnackBar! $_counter'),
    );
     ScaffoldMessenger.of(context).showSnackBar(snackBar);
  }

  @override
  Widget build(BuildContext context) {
    return Scaffold(
      appBar: AppBar(
        title: Text(widget.title),
      ),
      body: Center(
        child: Column(
          mainAxisAlignment: MainAxisAlignment.center,
          children: [
            const Text(
              'You have pushed the button this many times:',
            ),
            Text(
              '$_counter',
              style: Theme.of(context).textTheme.headlineMedium,
            ),
          ],
        ),
      ),
      floatingActionButton: FloatingActionButton(
        onPressed: _incrementCounter,
        tooltip: 'Increment',
        child: const Icon(Icons.add),
      ),
    );
  }
}
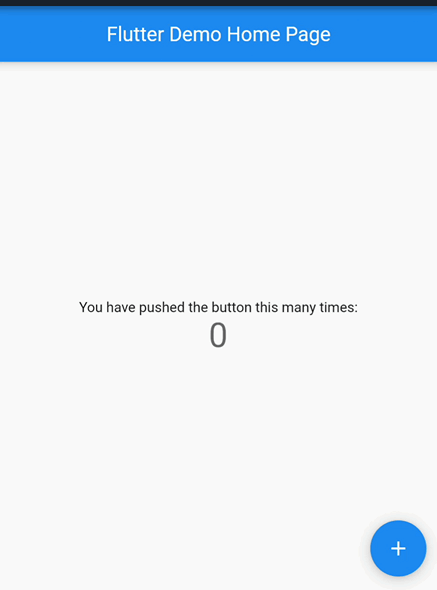
If you look at the code, the code looks fine and seems to work fine as well. Now I want you to copy the code to dartpad and run it. After that click the floating action button a single time, and then press the button 5 time continuously. Did you find anything odd?
If you click the button 5 times continuously, you would see something like this.
We can see that the snack bar keeps on showing even after a long time that we clicked. The snack bar persists even if we change the screen. If we clicked continuously, showSnackbar is sent to the event loop and they are executed no matter what. It is working as intended but it leads to a bad user experience. We want to make it so that only the last snack bar is shown leading to a better user experience.
Here, I am giving the example of a snack bar but what if I was calling API, it would be called multiple times. We want to make it so that if an action is performed one after another in a short interval of time, in this case tapping a button and showing the snack bar, the previous action is canceled and only the latest action is executed. So how to do so?
Debouncing
Debouncing is a technique used to avoid unnecessary processing by setting a delay before executing a function, so that if the function is called again within the delay, the previous function is canceled and the timer is reset again. The function is only executed once the delay timer has been completed without any new events occurring.
Here are some of the important of Debouncing:
It avoids unnecessary processing.
It optimizes performance by reducing function invocations.
It helps to enhance user experience.
It helps to optimize network requests and traffic.
It prevents race-around conditions.
So, let's implement debouncing in our Flutter app and see the result.
import 'package:flutter/material.dart';
import 'dart:async';

void main() => runApp(MyApp());

class MyApp extends StatelessWidget {
  @override
  Widget build(BuildContext context) {
    return MaterialApp(
      title: 'Flutter Demo',
      debugShowCheckedModeBanner: false,
      theme: ThemeData(
        primarySwatch: Colors.blue,
      ),
      home: const MyHomePage(title: 'Flutter Demo Home Page'),
    );
  }
}

class MyHomePage extends StatefulWidget {
  final String title;

  const MyHomePage({
    Key? key,
    required this.title,
  }) : super(key: key);

  @override
  State<MyHomePage> createState() => _MyHomePageState();
}

class _MyHomePageState extends State<MyHomePage> {
  int _counter = 0;

  final _debouncer = Debouncer(milliseconds: 500);
  void _incrementCounter() {

    setState(() {
      _counter++;
    });
       var snackBar = SnackBar(
      content: Text('Yay! A Counter SnackBar! $_counter'),
    );
    _debouncer.run(() {
      ScaffoldMessenger.of(context).showSnackBar(snackBar);
    });
  }

  @override
  Widget build(BuildContext context) {
    return Scaffold(
      appBar: AppBar(
        title: Text(widget.title),
      ),
      body: Center(
        child: Column(
          mainAxisAlignment: MainAxisAlignment.center,
          children: [
            const Text(
              'You have pushed the button this many times:',
            ),
            Text(
              '$_counter',
              style: Theme.of(context).textTheme.headlineMedium,
            ),
          ],
        ),
      ),
      floatingActionButton: FloatingActionButton(
        onPressed: _incrementCounter,
        tooltip: 'Increment',
        child: const Icon(Icons.add),
      ),
    );
  }
}

class Debouncer {
  final int milliseconds;
  Timer? _timer;
  Debouncer({required this.milliseconds});
  void run(VoidCallback action) {
    if (_timer != null) {
      _timer!.cancel();
    }
    _timer = Timer(Duration(milliseconds: milliseconds), action);
  }
}
It’s much better. We can only see the last snack bar. It is much better and user-friendly.
Now, how did we implement debouncing in our code? Let’s dive in.
class Debouncer {
  final int milliseconds;
  Timer? _timer;
  Debouncer({required this.milliseconds});
  void run(VoidCallback action) {
    if (_timer != null) {
      _timer!.cancel();
    }
    _timer = Timer(Duration(milliseconds: milliseconds), action);
  }
}
Here we are defining a Debouncer class. The Debouncer class has two properties: milliseconds and _timer. The _timer property is an Timer object used to manage the delay.
_timer = Timer(Duration(milliseconds: milliseconds), action);
The timer takes two parameters. The first param is the duration and the second params void callback or the function that is executed once the countdown/duration is completed. We can cancel the execution of the function at any time with _timer!.cancel().
Now let's look at run function.
In this function, at first, we are checking if the _timer is null or not. At first, it is null as we haven’t initialized it. As the _timer is null,_timer!.cancel() doesn’t run for the first time. After that the timer function is initialized and the action function that we provided is set to run after the time we provide. Now let’s see what happens when we call the run function again. This time _timer isn’t null as it has been initialized before, so _timer!.cancel() gets executed canceling the previous function that was set to run. If our next call exceeds the delay we provided, the function gets called. After that the _timer value is set again, to run the function again after the delay we provided. This process is continued again and again resulting in debouncing.
_debouncer.run(() {
      ScaffoldMessenger.of(context).showSnackBar(snackBar);
    });
In our code, we are passing the function to show the snack bar so that even if the user starts button mashing, the function gets executed a single time within the specified duration or time frame.
If you are still struggling to find a place to use debouncing. Use it in search.
Curiosity ignites, satisfaction revives. Keep exploring, keep thriving. As the saying goes,“ Curiosity killed the cat, but satisfaction brought it back.”